Browsing:

Tag: camo

Trending in Airsoft 2019 (Currently)

With airsoft companies constantly looking for ways to innovate the airsoft world, there is always something new to look forward to. With time moving forward, the trends are constantly changing. Weather it be gear, accessories, airsoft guns, or even camouflage. I am going to talk about some of the current airsoft trends in 2019.


AR Pistols

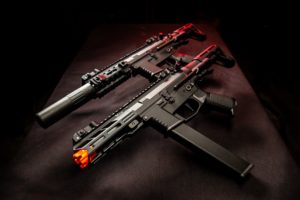
I would say the release of pistol caliber rifles in airsoft started in about 2017. However the trend didn’t pick up until the middle of 2018 and carries on into 2019. With manufacturers like Classic Army, G&G, and Ares all having versions of a rifle with a pistol caliber style magazine. I think it is safe to say that AR Pistols have made a permanent home in airsoft.
Camouflauge

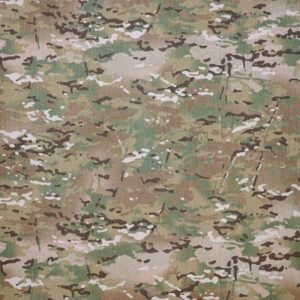
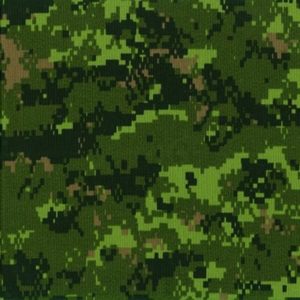
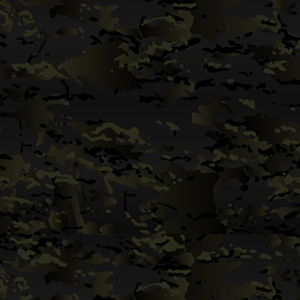
Everyone has a personal favorite when it comes to camo patterns. I personally love Multicam and Woodland. I know a lot of others who would agree with me. However with new studies and releases of different camouflage patterns. There are some patterns that gain popularity. With everyone’s personal opinions set aside. The current trendy camouflage is CADPAT! That is right! I am just as surprised as you are! Canadian Disruptive Pattern is the current trend. Released back in 2002 for the Canadian Armed Forces. CADPAT has made its way around the airsoft trends. I do believe that eventually everyone will go back to Multicam. (Cisco is a little salty!) We have notice that Multicam Black is starting to rise in popularity again.
Grenades

There are a plethora of airsoft grenades on the market. Both sound grenades the the “Thunder B” Style or BB Spreading grenades like the Z-PArts ERAZ Greande. The newest airsoft grenade to hit the market is an updated version of a classic! Airsoft Innovations released their Tornado 2 Timer Grenade! Shooting out 200 BBs at 240 FPS, with a 360 degree spread. This will tag everyone in the target room of your choice! Airsoft Innovations has released a plethora of awesome products throughout the years. The Cyclone Grenade, XL Burst Banger, and the 40 Mike are some of my favorite products. The Tornado 2 Timer Grenade gives you different options of use compared to their impact grenades.
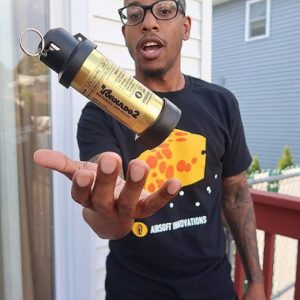
RGK with the Airsoft Innovations Tornado 2 Timer Grenade

MOSFETS

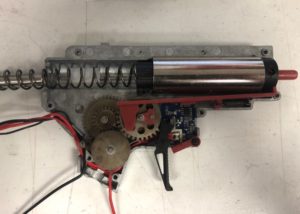
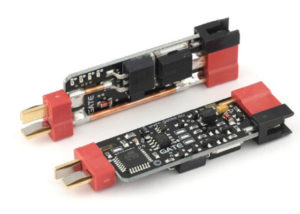
Since about 2014, MOSFETS in airsoft have become very popular. To the point where some manufacturers are including them out of the box! MOSFETS originally were used to help regulate the electricity flow. They have now evolved into being able to program settings and increase the performance of your airsoft gun. Companies like GATE and JeffTron are after market MOSFETS that will help increase the overall performance of your airsoft gun!
Tracer Units

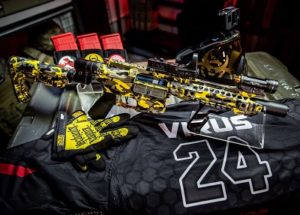
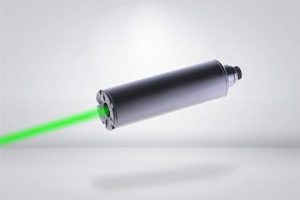
Glow in the dark BBs have been around for a long time in airsoft. With more players now wanting to record their game play and see track their BBs. Tracer units have become more popluar. Companies like AceTech and XCortech have made the huge advancements into tracer units. Allowing for more compact designs.


What are some of the trends in airsoft that you know? If there are some we missed, let us know! We are always looking out for whats new and in demand! If we get enough submissions, we will do another list and shot you out!


Painting It Right – Part 1: Materials and Getting Started

Hello Airsofters; Chris here from the GI Virginia store. In this post I wanted to run through a quick step-by-step about the proper way to paint your Airsoft guns, and things to both do and avoid if you decide to give your blaster a little extra personality. This first blog post will cover more or less just the basics of painting, mostly about what kind of paints to buy and how to go about the beginning process of laying a good base coat on your replica.

First and foremost, do understand that painting any part of your gun does generally void any warranties from manufacturers. I usually recommend waiting the 30-90 days for the warranty to run its course before I spray my gun. This ensures that if anything goes wrong with the gun right off the bat, you can get the issues taken care of as easily and seamlessly as possible. Also please keep in mind that removing or painting the orange tip of most guns also accomplishes the warranty being voided, so tread carefully or accept your fate before you get started.

Step One; Buying Paint

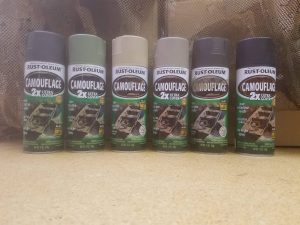
With that out of the way, let’s get down to the nitty-gritty. The biggest part of painting your rifle is selecting the right paint for what you need. If you want to do a more modern, military focused paint job, or really any paint scheme that doesn’t look like something from Stargate, you’re going to want to buy a very specific type of paint. Specifically, Krylon or Rustoleum Camouflage paints. Anything labeled Ultra-Flat is exactly what you’re looking for. The number of colors offered in these ultra flat finishes is limited, usually, to tans, greens, and browns. Keep that in mind when you do your shopping. PS; don’t forget to paint to your surroundings. Think about where you normally play and what kind of foliage and colors exist in that space when you buy your colors.

Rustoleum and Krylon flat colors make the best for spray painting camo patterns for your guns.
The full suite of Rustoleum Camouflage paints. These have always been my go-to.

The Pattern for Painting

Now, the most important decision you make will be what pattern you decide to put on your gun. Don’t forget that the end goal of any camouflage, either on your clothes or your gun, is to disrupt the outline of the shape. A gun is a very recognizable silhouette, so keep this in mind when you spray your patterns onto your blasters. Once you’ve decided on a pattern and color scheme, all that’s left is to gather materials, tape up what needs to be protected, and get it started.

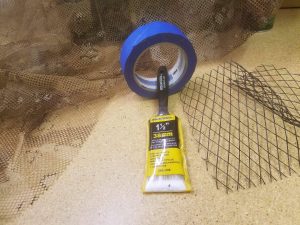
Typical Painting supplies can be found at most "big box" stores including Walmart, Home Depot, Lowes, etc...
Painters tape, a brush or sponge, and some different sized mesh will help you along the way nicely. Camo netting, like the material on the left, can be purchased for cheap at most surplus stores. For larger mesh, I suggest finding laundry bags

Taping it off

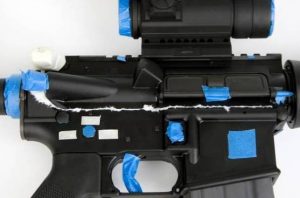
Taping up the gun is important, as the process will keep important areas of the gun protected and paint free. This includes any and all attachments you don’t want painted, including glass on optics, flashlights and lasers. Also keep in mind that the inner barrel of your gun needs to be stuffed and taped up at the end. I recommend just shoving some shop towel or paper towel into your muzzle to absorb and block the paint. Tape that down to ensure it doesn’t shift out of place.

After this, tape up your trigger, should you wish to do so, and tape up any trademarks you want to keep covered. Also remember to either insert a magazine into the gun to be painted simultaneously, or tape up the magazine well to protect your hop up unit, if you choose to leave your inner barrel installed during painting. Some people prefer to take out the gearbox of their gun to ensure no paint touches it, but realistically, as long as your dust cover is closed then you should be good to go without affecting performance.

Photo pulled from Google Images to display taping off of firearm.
A good example of some finished taping work

The Process for Painting

Some people prefer to hang their guns to produce a more consistent product from side to side on the gun. Laying the gun down on a flat surface, however, will do in a pinch. First up, decide on your base coat color, and apply a very light coat from about a foot away. Sweep the can from side to side while pulsing the button to release paint. Think about shooting the spray paint on semi automatic as opposed to full auto. Holding the button down and spraying the gun will result in thick, sticky paint that could potentially show runs. This will produce a pretty poor looking finished product.

Remember that this initial base coat isn’t really about coloring the gun; it’s more or less just giving the next few layers something to stick to as you go forward. After your base coat is applied to both sides and has been given time to dry, apply a second coat of the same color, going perhaps a tiny bit darker on this one in order to ensure your base color shows through the next couple layers you’ll be applying on top. Allow this coat to dry.

On the next blog, we’ll be talking about putting pattern on guns. Also, we will discuss what kind of materials to use to produce the effects that you want.

Need to pick a gun to get started? How to Pick the Best Beginner Gun

[Airsoft GI]
http://www.airsoftgi.com/index.php
[New Products]
http://www.airsoftgi.com/new_products.php  
[Airsoft Guns]
http://www.airsoftgi.com/Airsoft-Guns-139


Army to Adopt OCP?

This just in:

According to the J&A (Justification and Approval) published on Oct 11th, 2013 by the ACC (Army Contracting Command), a contract was given to Crye for OCP, which is more well known as Multicam. So at this point, we can expect to see UCP being phased out and replaced with Multicam in the coming years.

Multicam

Crye’s Multicam is a very versatile platform that can work reasonably well in multiple environments and terrain. The choice to go with a universal pattern makes sense from a logistics and financial point of view, as having one unified pattern for all terrains means that only one kind of uniform needs to be purchased (by the taxpayers), and shipped to, every soldier. This saves money on having to buy multiple colors of the same uniform for each infantryman.

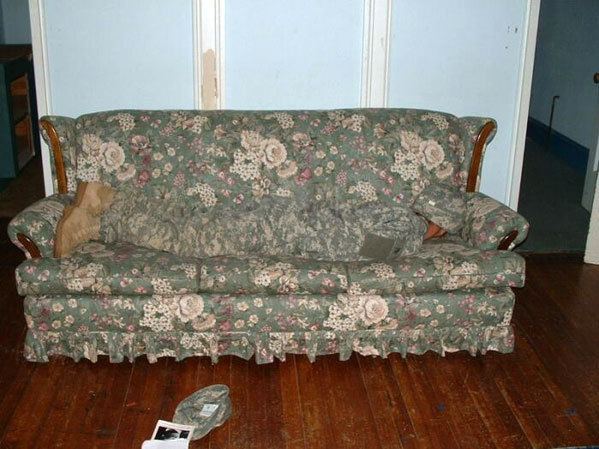
Arguably, the UCP pattern was a colossal failure, as the pattern didn’t seem to fit well in any terrain at any time of the year. OCP, as stated earlier, works marginally better in every terrain over UCP.

UCP works on certain couches


Left to Right: Mirage, Multicam, UCP

At this point, there is no DoD (Department of Defense) contracts being issued due to the government shutdown. I’m personally excited to see the where the army takes the OCP pattern, as it has also been rumored that they plan to use the pattern, and adopt a three pattern scheme in order to account for woodland, arid, and transitional terrain.


A-TACS LE Edition

Check out one of the newest patterns to come out of the A-TACS line. The LE (Law Enforcement) edition pattern is available for purchase at www.schottfabrics.com.

The A-TACS LE camouflage print was developed in conjunction with law enforcement professionals. It has been described as a uniform meant to be a “show of force” pattern, not designed for concealment. This definitely seems to be the case, as this pattern is both stylish and recognizable. Be prepared to see tactical entry teams and specialized units to start sporting these colors.

For every purchase of an A-TACS uniform including the LE pattern, Digital Concealment Systems will donate a portion of the proceeds to the Spirit of Blue Foundation, which is a non-profit organization dedicated to increasing officer safety and fulfilling LE safety equipment and training needs.

Will A-TACS LE be as famous as the LAPD blue uniform? At this point, only time will tell. Comment below if that is a pattern that you’d be interested in, and visit the Airsoft GI Facebook to check out the latest news!

Spirit of Blue Foundation

Airsoft GI Facebook

www.airsoftgi.com


The Most Xtreme of Combat Shirts

The Tru-Spec Xtreme Combat Shirt is the perfect combination of the protection of a highly durable BDU top and the comfort and lightweight feeling of a long sleeve base layer. The sleeves of the Xtreme combat shirt are similar to those of a standard BDU top, with the zippered Velcro pockets that are angled forward, raid-style, for a more aggressive look and easier access. The sleeves also have textured elbow sections that can be opened up to house an elbow pad if necessary. The left sleeve features an extra map pocket down near the wrist area while the right has a section meant to hold pens, knives, or other small tools that can be clipped on. The body of the Tru-Spec Combat shirt consists of a nylon/cotton blend base layer, which unlike a regular BDU, is very breathable, light and is able to wick away moisture almost 3 times faster then cotton. It features a thick collar made of the same material as the sleeves providing some extra neck protection, as well as a zipper extending to the center of the chest allowing for easy changing of the shirt as well as some extra breathability.

The Xtreme Combat Shirt is very similar to Tru-Spec’s standard combat shirt in that it has the same nylon/cotton body and BDU-style sleeves, but the two are not the same. Whereas the standard combat shirt features reinforced padded elbow sections, the textured elbows on the Xtreme shirt can be opened to insert hard elbow pads for even more protection. The collar on the Xteme shirt is also different from that of the standard combat shirt in that it is taller, thicker, and made of the same material as the sleeves, and it can be zipped open similar to the buttons on a polo shirt. Finally, the pockets on the sleeves of the Xtreme shirt are angled forward raid-style while those on the standard shirt are vertical, and the standard shirt does not have the added map pocket or the section for clipping on extra tools.