Airsoft Basics – Gear Setup Part Two | Recon
June 6, 2017
We’re back with another edition of Airsoft Basics, our featured series here on the Airsoft GI TV Blog where we teach you some of the things you need to know in order to step up your game as a new airsofter. Today’s topic is setting up your gear to accomplish the Recon role when you are out playing games. This means getting outfitted the right way so you can call in enemy positions, hit and run the enemy, and stay high speed and low drag!
As always, before we begin, it’s important to note that we’re basing this advice on personal experience playing airsoft. This is by no means to be construed as a be-all-end-all way to set up your gear. As with most things in the hobby of airsoft, Personal experience makes a big difference in how you’ll set up your gear versus someone else. Additionally, while it’s not the advice given in this article, sometimes people will make concessions for the sake of looking good or because it’s accurate to an impression-based kit they are trying to set up. All of these are perfectly valid, and it’s going to be up to you to decide how you want to do it.

Click past the jump to see how we recommend you set up your kit!
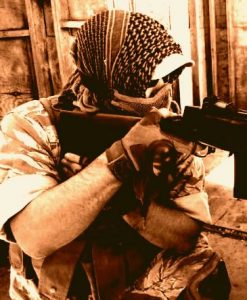
Sometimes, kicking in doors isn’t the way you want to play airsoft. With the rise of popular channels like Swamp Sniper and Novritsch doing the sniper thing is fast becoming one of the most popular trends in the game these days. We’ve opted to show you a more open-ended approach to being “recon” but it’s certainly functional for sniping and especially useful for guerilla tactics on the airsoft field. As before, we’ll follow the same five steps we utilized to determine how to make the best “Assault” setup, which you can read more about here.
Step 1: Picking a Vest
This step is the foundation of any loadout, but recon roles give us a unique dilemma, what if you don’t want to run a vest at all? It’s not uncommon for many in the recon role to forgo a traditional vest entirely, as it adds unnecessary weight and bulk to your body and can make squeezing into those tight sneaky spots a bit difficult. This leads many people to two options, a battle-belt or a chest rig.
As Always, you need to be aware of what kinds of items you will be carrying, because mission dictates setup.
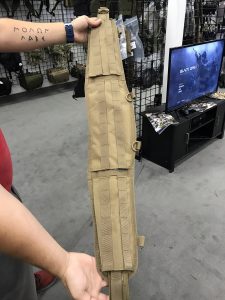
Both options are equally as good as one another, and it becomes a matter of the style of play you are looking for. Personally, if I plan on spending a lot of time prone, or in unconventional positions (because I am sniping or the field is not laid out in a typical way) I will opt for the battle belt and use a pair of suspenders to help distribute the weight similar to this Condor Molle Battle Belt and matching suspenders, or this HSGI Suregrip Belt.
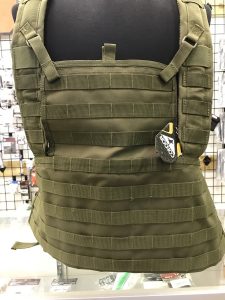
Alternatively, if I’ll be doing more hit and run style gameplay, or playing a recon role that leans a little bit more towards the assault style, I’ll go for a chest rig set up similar to this Condor Ronin chest rig (which lets you unclip it in the front if you do need to go prone) Or this Lancer Tactical Operator Chest rig (which offers similar features, but with a zipper). This allows your load to be centralized and reduce excess torsion on your body as you hustle from objective to objective.

Step 2: Picking your pouches
This part will remain the same throughout many of these load out recommendations as the concept rings true no matter which role you are performing. Make a list of all of the items you will need during your event, then a list of pouches you need to consider. Some of the chest rigs we’ve recommended earlier will have these built in, so make sure you factor that information into your list. From here, decide on some quality pouches that suit your needs, and make sure you cover your basics, Ammunition, Water, and at least one good general purpose pouch, because you never know when you’ll need it, but you always ending wishing you had one when you forget it. It’s also worth mentioning, that you’ll want to make sure you have a very solid radio before you hit the field as well, it’s by far the most important part of your kit as a recon player.
Step 3: Placing your pouches
During this step, be mindful of your play style and the location of your event. As stated before, if you’re going to be spending some time prone, reduce the bulk on the front of your body, transitioning mission essentials to your support-side (or non-dominant hand side) for ease-of-access to things like magazines or your radio. If you are using a sidearm, keep that easily accessible too, as often times, field minimum engagement rules often mean you’ll be making much more use of your sidearm than the average player. The most important thing about being a recon player though means that you need to be able to access everything on your kit yourself, especially if it’s mission essential, as you may not always have teammates around, or be in a position to have someone get something for you that you can’t reach when you need it. This is solid advice for any role, but it’s extra important here for the serious recon player.

Step 4: Augmenting your kit with additional gear
This is an optional step, because there’s no reason you can’t carry everything you need for a day’s play on a chest rig or battle belt set up. However, if you are extending your game time past a typical day of play, or want to make sure you have absolutely everything you need on you, there are a few options.
Firstly, a backpack is a great addition. Generally speaking, you won’t have a back plate bag to worry about as most recon players avoid a proper plate carrier or vest, and this makes lugging a back pack around a much more suitable option. Backpacks come in all shapes and sizes from small Assault packs like this one from Condor, to larger multi day assault packs like this Condor Titan.
Secondly, if you choose a chest rig, you can still supplement your chest rig with a battle belt for essentials. This is my preference, as it allows me to offload all of my pistol/sidearm essentials onto one piece of kit that is the same across all of the roles I’ll play at events during the year. This does add up in cost pretty quick though, so be mindful.
Lastly, leg platforms for extra magazines, general utility pouches, or a pistol are a possible option to expand your load carriage as well. Keep in mind that these types of pouches do make sneaking through the brush a bit more precarious though, as the extra bulk on your legs will inhibit your movement, so you will need to weigh the cost of that additional storage versus your mobility.
Step 5: Get out and Play!
You can’t possibly know what’s going to be 100% perfect for you until you’ve taken in to the field and tried it out. What we recommend are setups that work for us, but they may not necessarily be perfect for you. We can offer you the basics, but where you go from there is entirely up to you! Be open to making changes, and don’t treat the advice we’ve given above as the word of law, just a strong suggestion towards what we know has worked for us.
Once you get your kits set up, post them on social media, and make sure you tag Airsoft GI and use #airsoftgidotcom so we can see all your sweet kit pictures!
[Airsoft GI]
http://www.airsoftgi.com/index.php
[New Products]
http://www.airsoftgi.com/new_products.php
[Airsoft Guns]
http://www.airsoftgi.com/Airsoft-Guns-139

