Transformations: A Guide to Stippling Airsoft Pistols
October 22, 2019
So You Want To Stipple Your Grip…
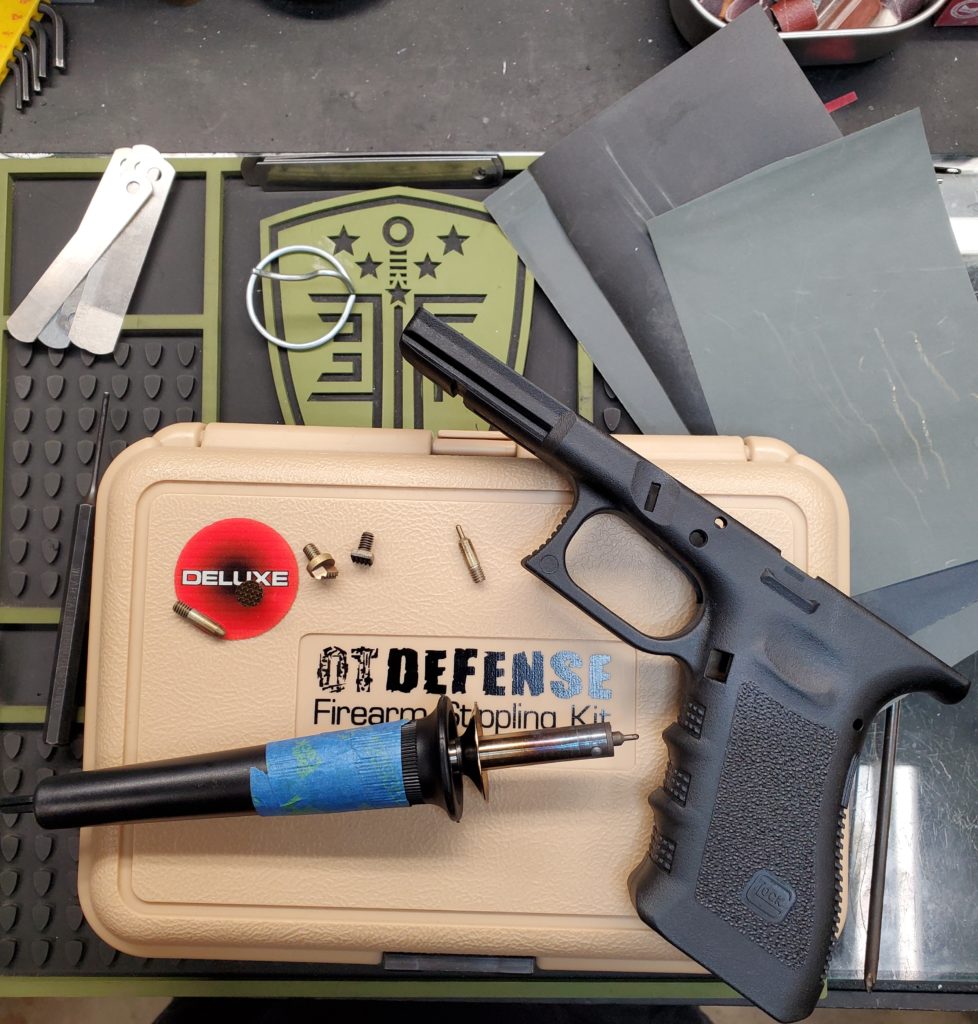
Airsoft guns including pistols and rifles have always followed the trends in the firearms world. Simply put our passions are replica firearms so we will follow the same trends. Stippling grips, meaning changing or adding texture to the grip of a gun, has been done in the shooting sports competition circuit for years. In recent years we have seen “stippling” immerge as a popular form of customization to a personal firearm. The most common way to stipple a grip is through the use of a wood burner or soldering iron. The process of stippling is to use the wood burner to melt patterns into a polymer grip to change the texture of the grip. The most popular gun styles to be stippled are Glock, Sig P320, and any pistol with a polymer frame.
Enough about firearms! We are here to talk Airsoft and, in this article specifically airsoft pistols.
What Does Stippling Do Exactly?
Stippling serves two major purposes: function and form. Some would consider stippling an art form, where for others it is a means to a performance driven end. If done properly a stippling job can look cool and improve the function of an airsoft pistol. When we talk about function, we can talk about many different factors. Through stippling, an airsoft pistol can be tailored to fit the shooter’s preferences. First, determine what your end goal is as it will affect what is done to the grip during the preperation phase. Ask yourself the following questions:
- Is the grip comfortable in my hands?
- Is there enough traction on the grip surface to prevent the pistol from shifting as its being fired?
- Is the grip to thick?
- Are there finger grooves and if so, are they in an odd position?
These questions will help you determine the function of your stippling project.
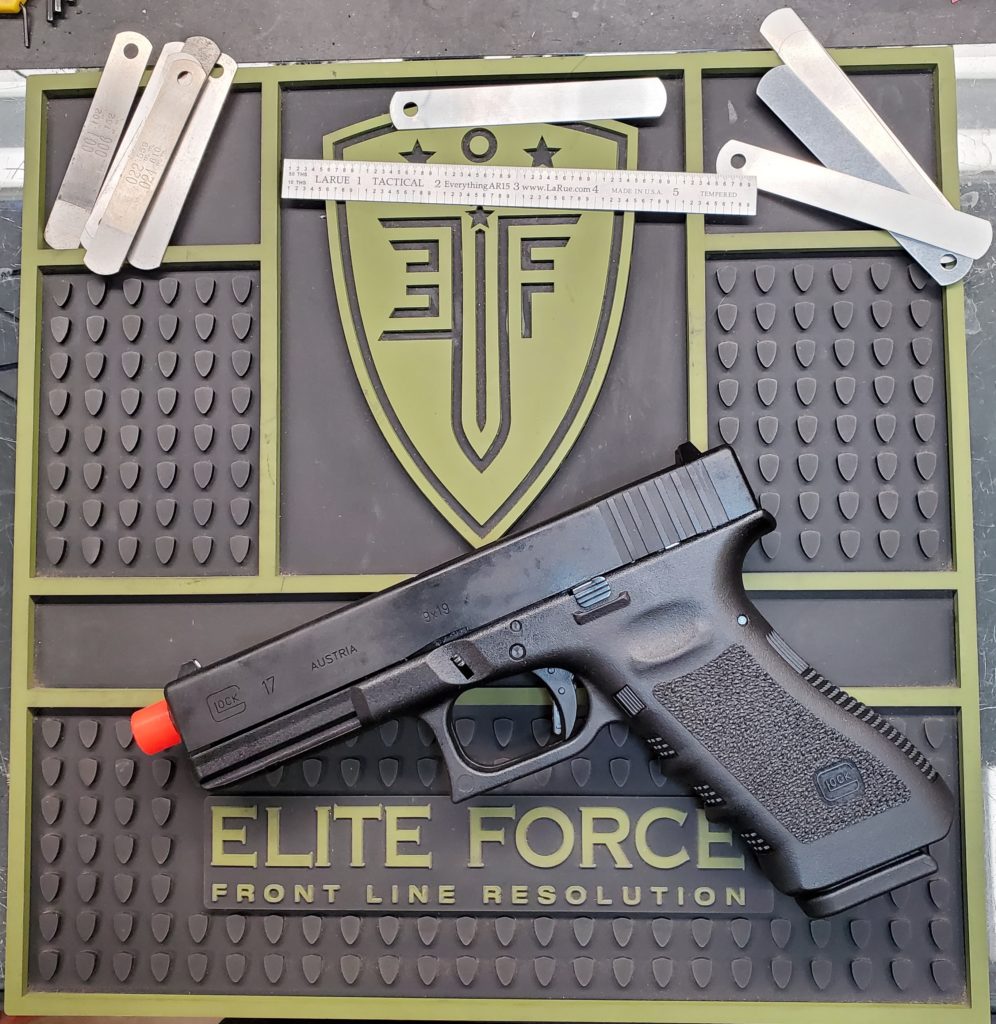
In this article we perform the following modifications to an Elite Force Glock 17 gas blowback pistol:
- We will be using a random pattern.
- A grip reduction will be done to the grip.
- Single under cut will be added.
- Thumb ledges will be added to the forward portion of the frame to assist in recoil management.
- 45 degree cut on the front of the trigger guard will allow the pistol to clear the holster a split second faster.
- Finger grooves will be shaped or deleted depending on comfort level.
Before we begin let’s get some warnings out of the way:
- Always use eye protection when handling or working on an airsoft gun.
- Any modifications to an airsoft gun may void any warranties.
- Choose a well-ventilated area while performing the stippling work and wear a respirator.
- Make to clear your pistol!!! Clear the chamber and Magazine
Tools needed:
- ANSI Z87.1 rated safety glasses. (When in doubt, use your airsoft goggles!)
- Dremel or similar rotary tool w/assorted sanding drums
- Sand wet/dry paper 400, 800, and 2000 grit
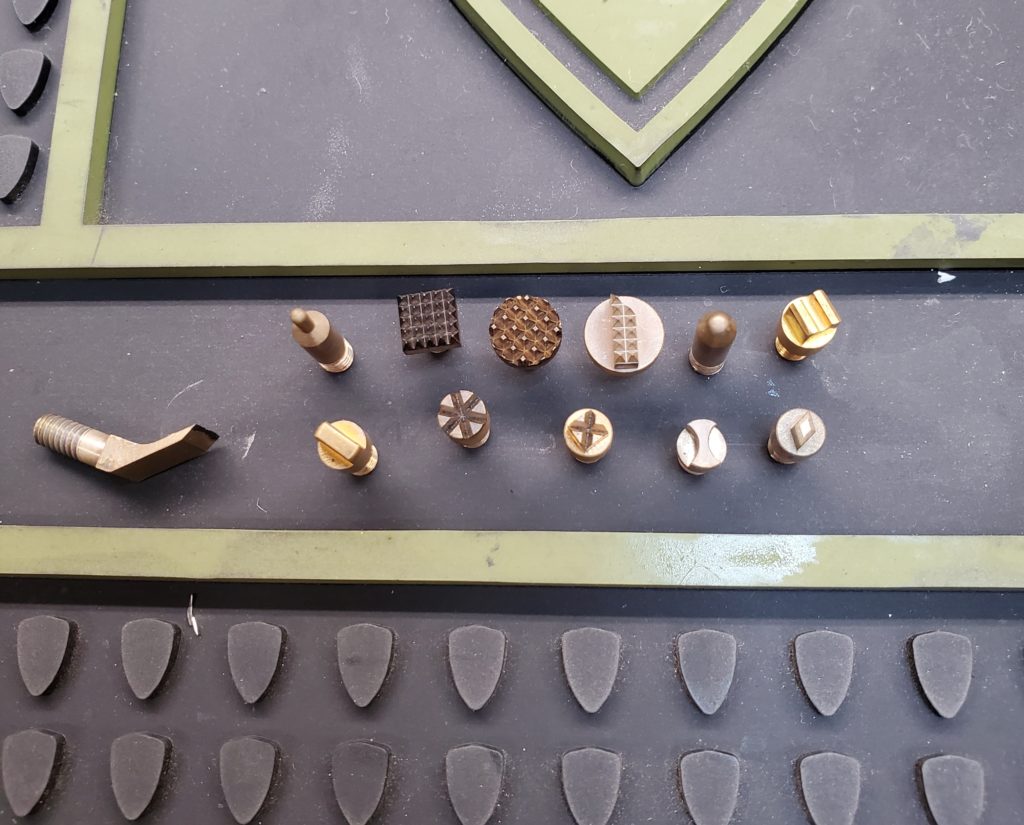
- Soldering Iron or Wood burner 25-watt w/ assortment of tips
A stippling kit can be found here: OT Defense
- Flexible metal ruler or set of feeler gauges.
- Rubbing alcohol or CRC QD Electric Cleaner, or a plastic-safe degreaser. It must be safe on plastics.
- Shop towels
Frame Preparations
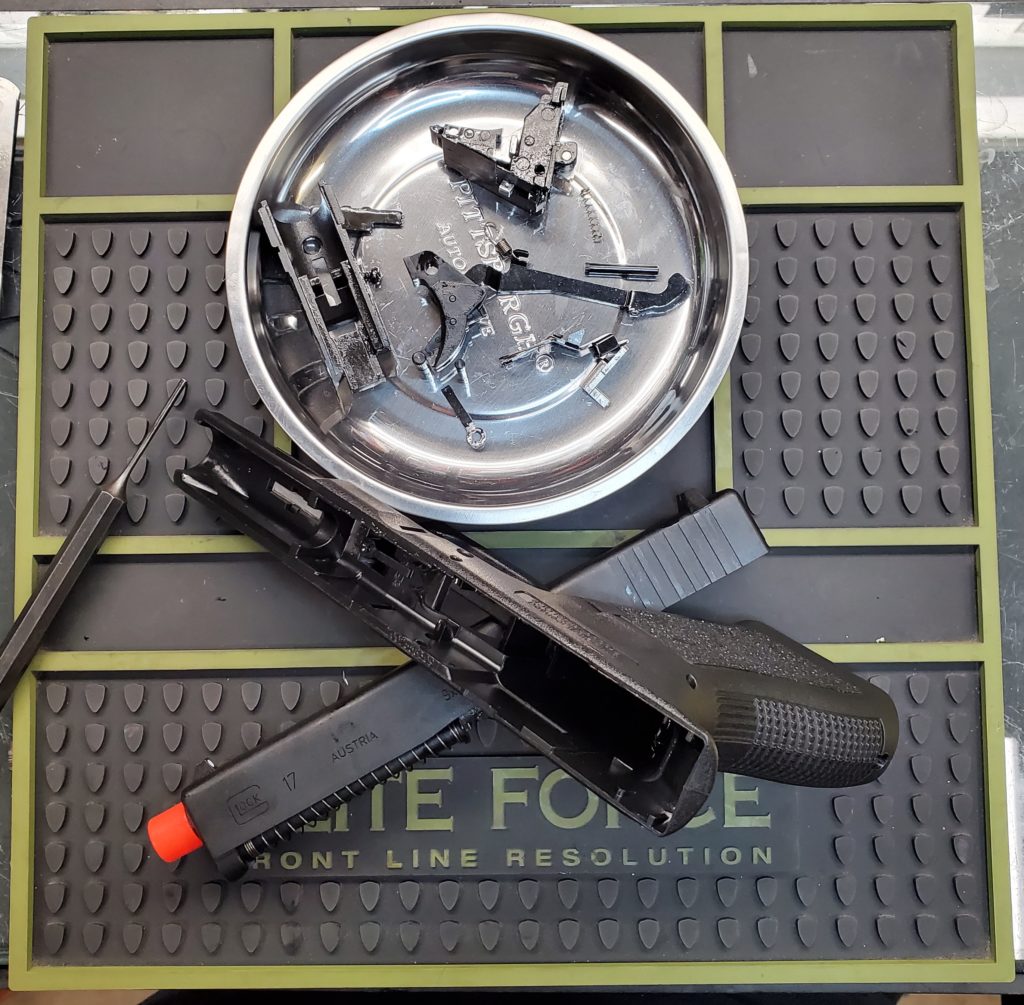
Break down the airsoft pistol completely. The goal here is to completely strip the frame. This is so we don’t damage any internal components during the stippling and cleaning process.
Seperate all of the parts removed from the frame. We do not want debris getting into the trigger, sears and other internal parts that will cause problems during reassembly later. find a safe storage place like the metal tin shown below, or a plastic bag, and set them aside until you need to put the pistol back together.

Once the frame is stripped down, we need to degrease the frame. Remove all oils from the frame. Soak a shop towel with rubbing alcohol or spray the frame down with the QD Electric Cleaner. DO NOT USE Brake Cleaner! When you are finished, wipe off any residual oil residue. This ensures a clean work surface for the rest of the process.
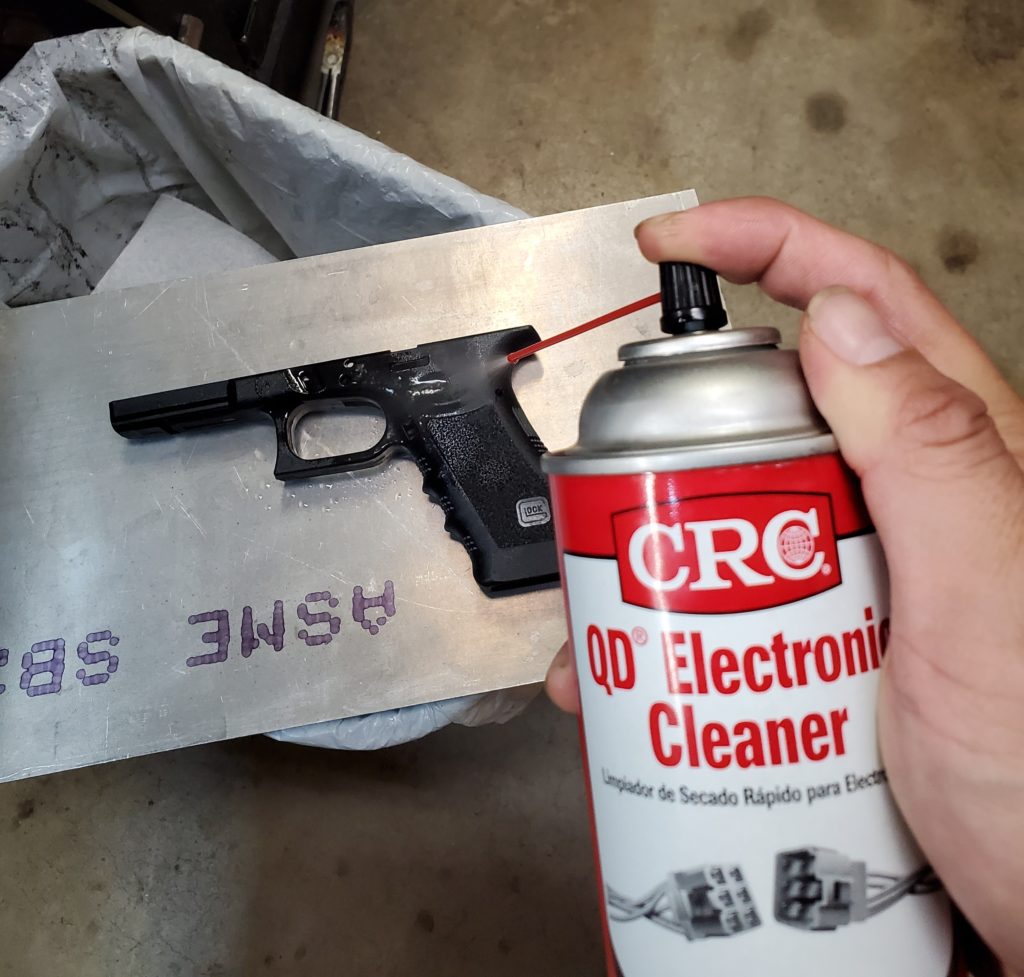
Once the frame is de-greased, we can move onto the next step. We will begin to shape the grip and add the features we discussed before. Warning! This is the point of no return. Once we begin, the pistol will never be the same.
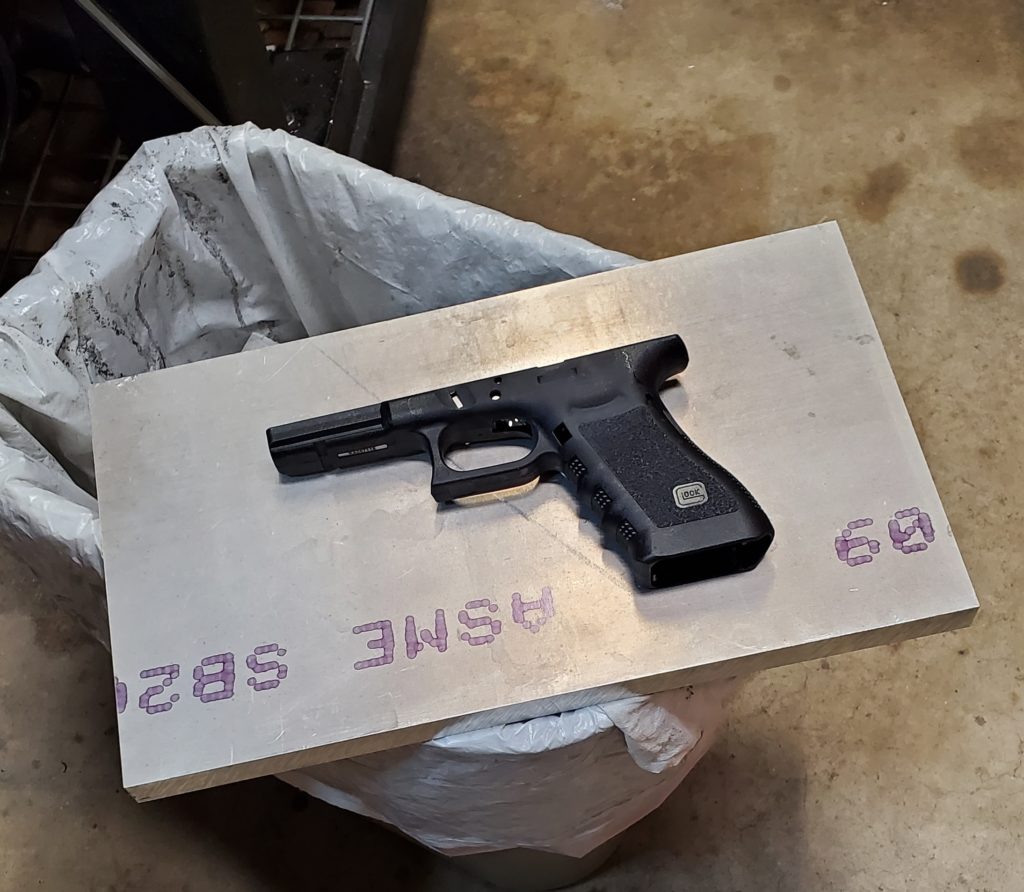
Grip reduction can be done with a Dremel. Beginning with a coarse sanding drum; sand the grip to remove material. A little goes a long way, so take your time and be gentle. It’s hard to add material back to the frame, so be careful not to remove too much material too quickly.
We do not want to weaken the structural integrity of the grip. We are removing the existing texture and doing our best to keep an even surface. The Glock logo is being preserved as well so we carefully removed material around the logo. We left portions of the frame to remain un-stippled, and did not sand these portions either. It is not necessary to stipple the entire gun, how much or how little you choose to stipple will inform your sanding locations in this step.
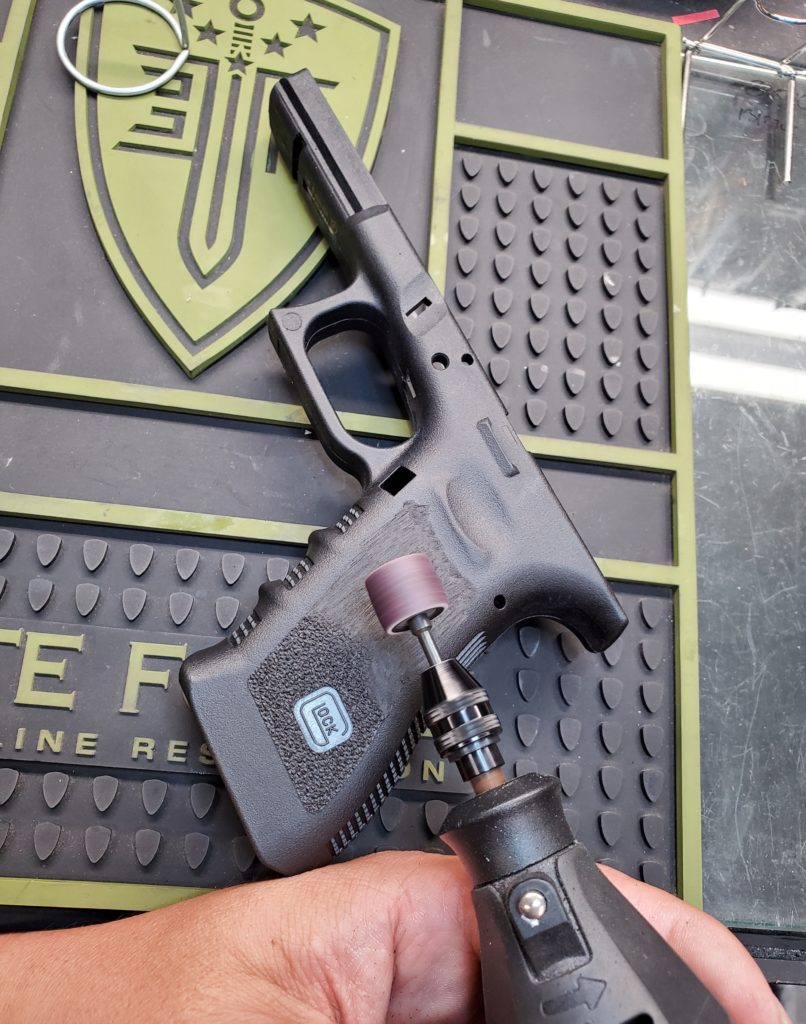
We shaped the finger grooves by removing the molded checkering on the Glock frame. In the interest of preserving the structural integrity of the frame, generally, it is safe to just grind the checkering down flat.
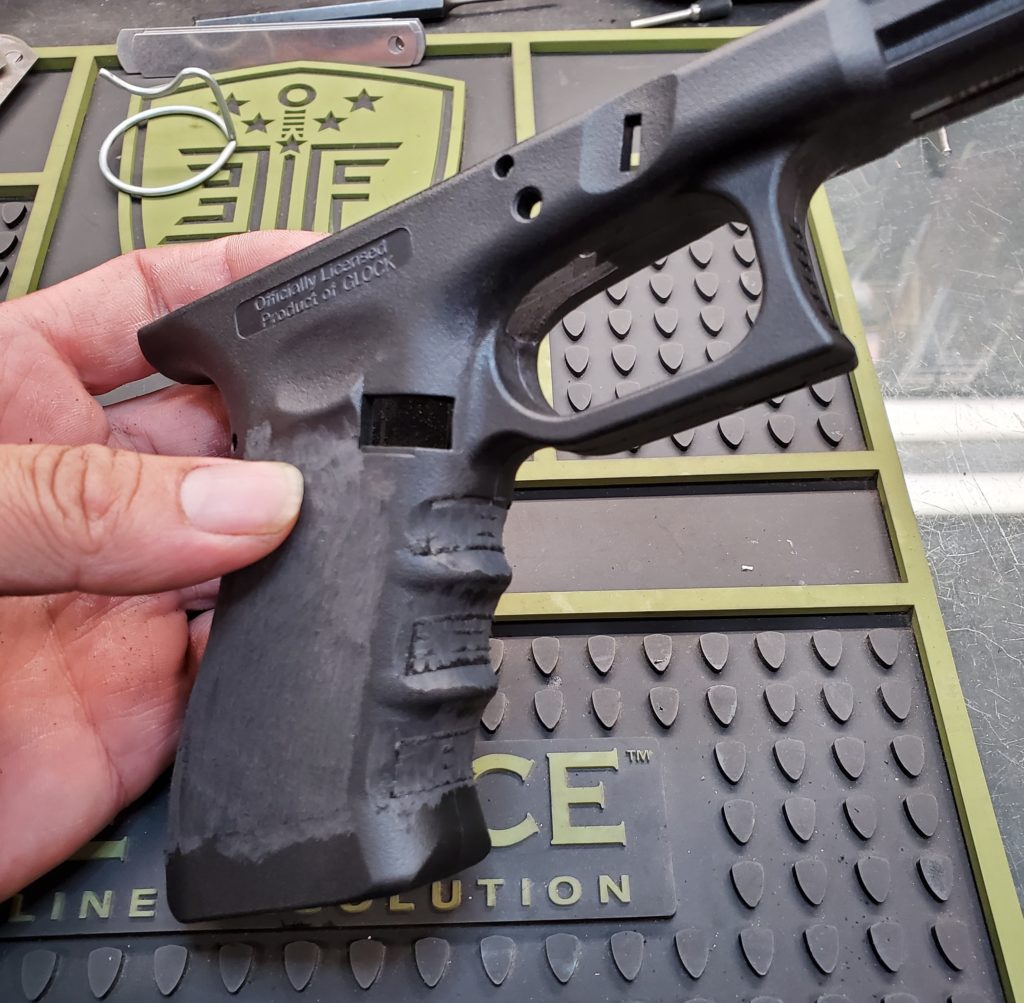
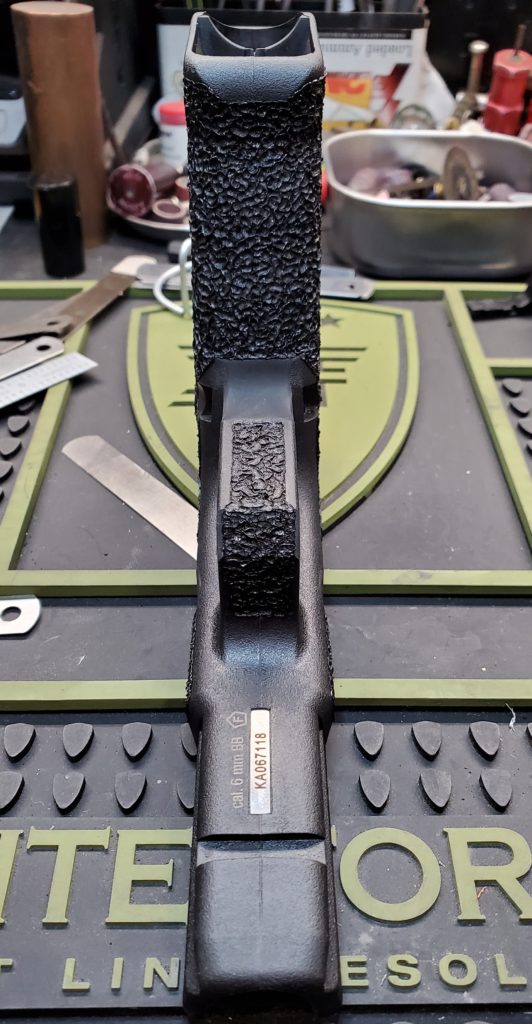
Remove the molded checkering on the back strap. This step will further reduce the thickness of the grip. Remember to be conscious of not hurting the structural stability of the grip when you do this step as well.
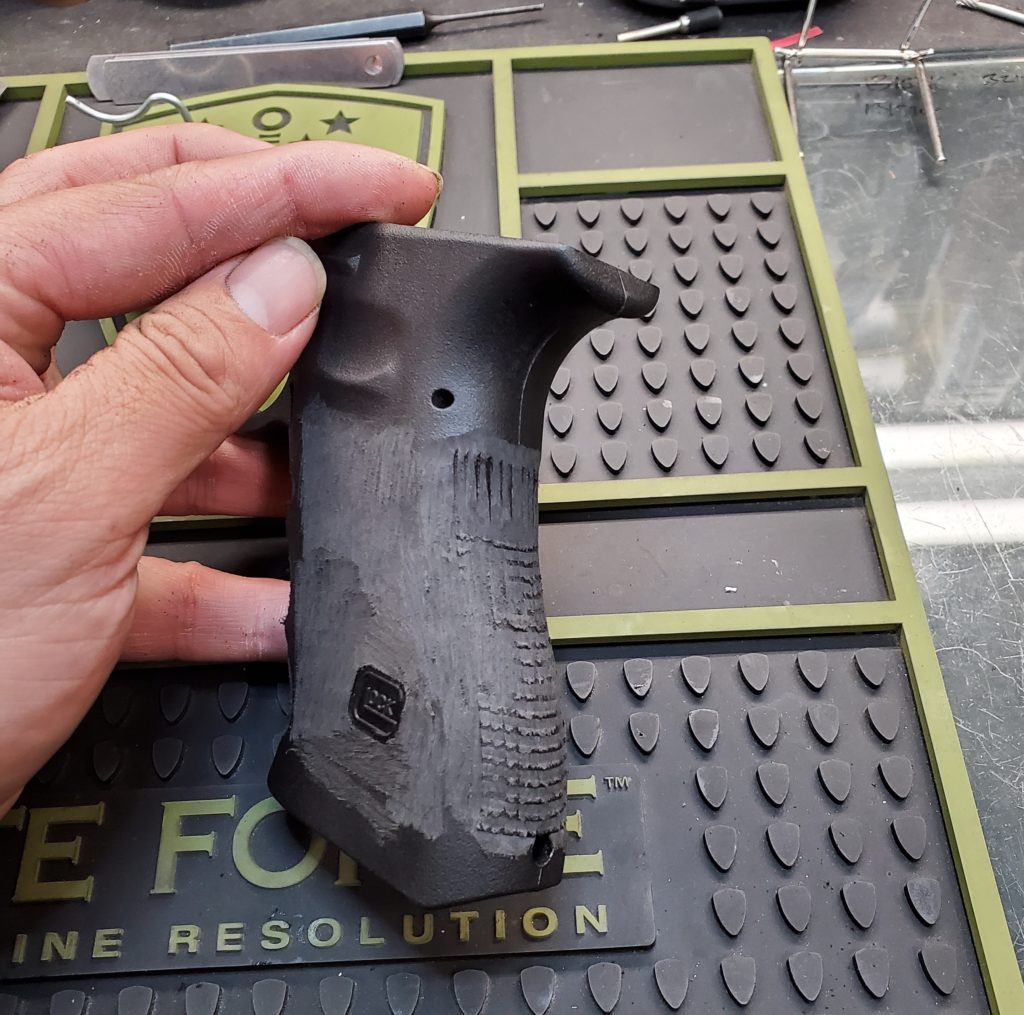
At this point it is time to stop. Most of the sanded surface will be stippled over. It’s time to put the pistol in your hands and check your work before continuing. You want to feel for high spots on the grip and level them as needed. You will also want to test the general feel of the grip for comfort, alignment and ergonomics. Make any additional adjustments to your sanding and shaping at this time.
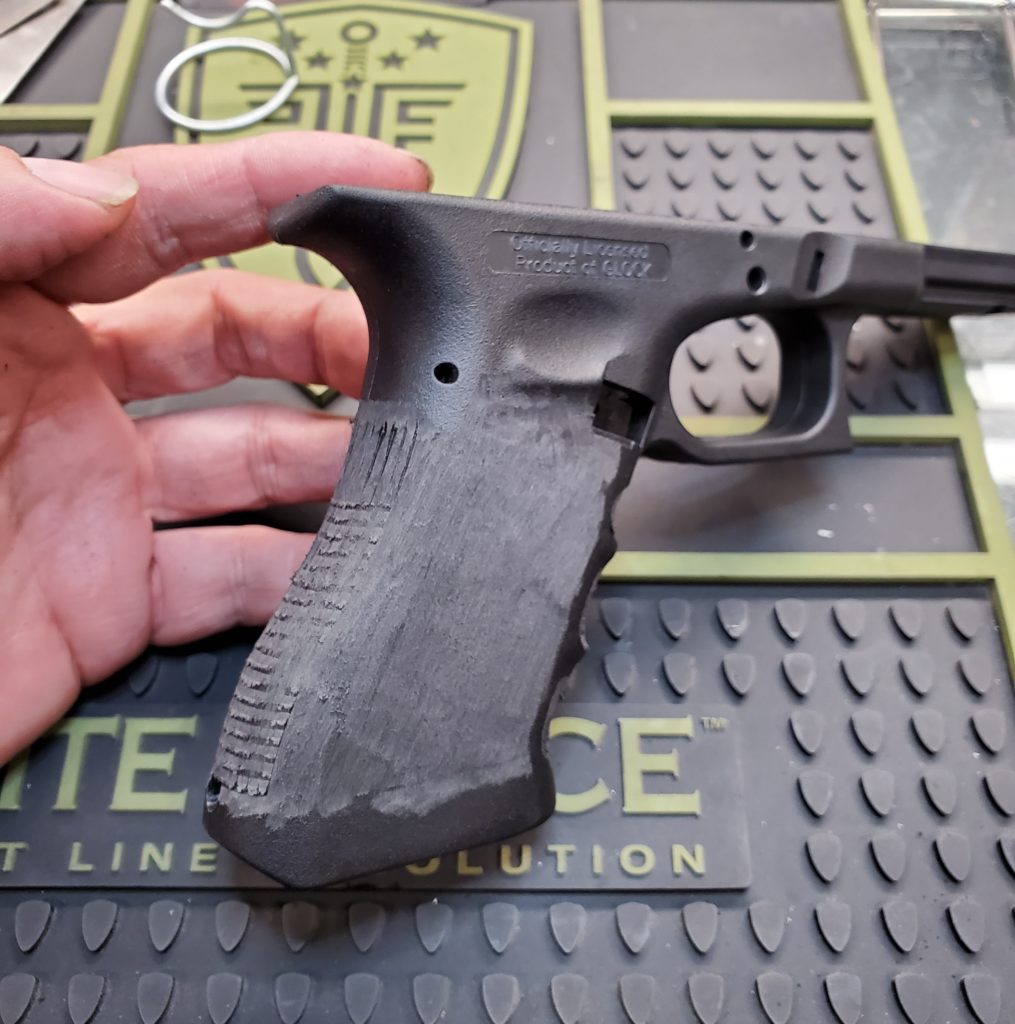
Next, we will create the thumb ledge. The thumb ledge will act as a sort of “gas pedal” that allows the shooter’s thumb to sit on a ledge to assist with recoil management while firing. This can be done with a Dremel using a sanding drum; however the results will be dependent on the proficiency of the user of the Dremel. In our case, We have a jig that holds the frame in a vise and then cut the thumb ledge with a mill for the best results.
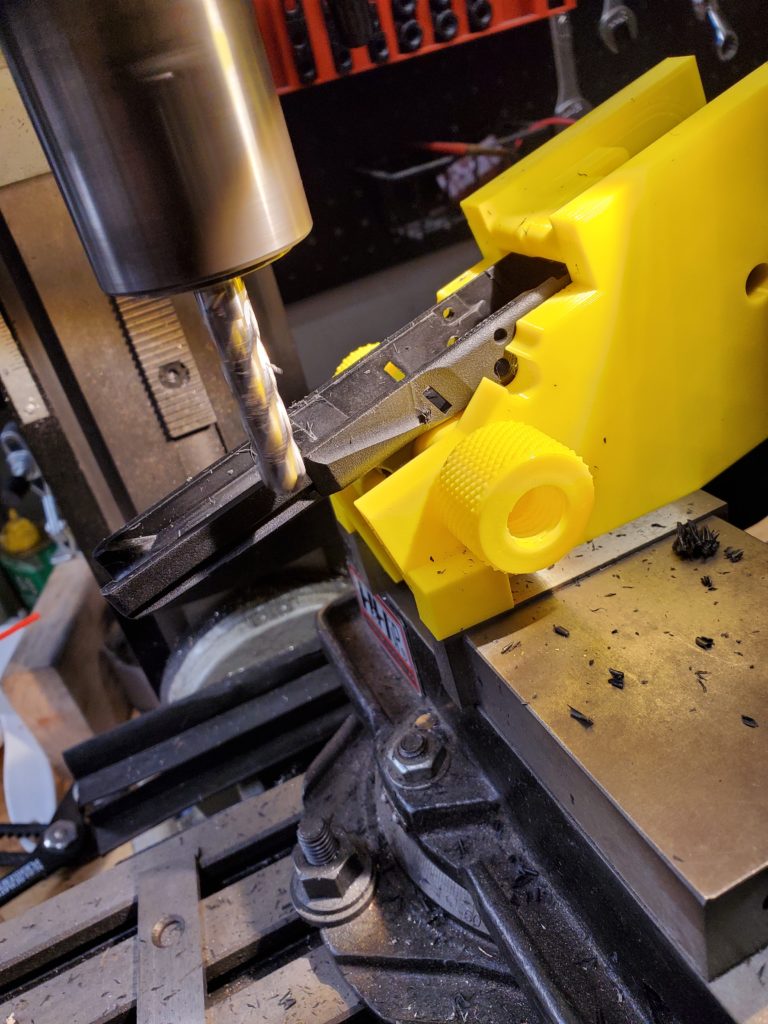
The result is a nice clean thumb ledge. Using sand paper we sand away any machine marks and shape the thumb ledge to have the same finish as the slide release cuts. Starting with 400 grit and going up in grit to 2000, sand the thumb ledge smooth.
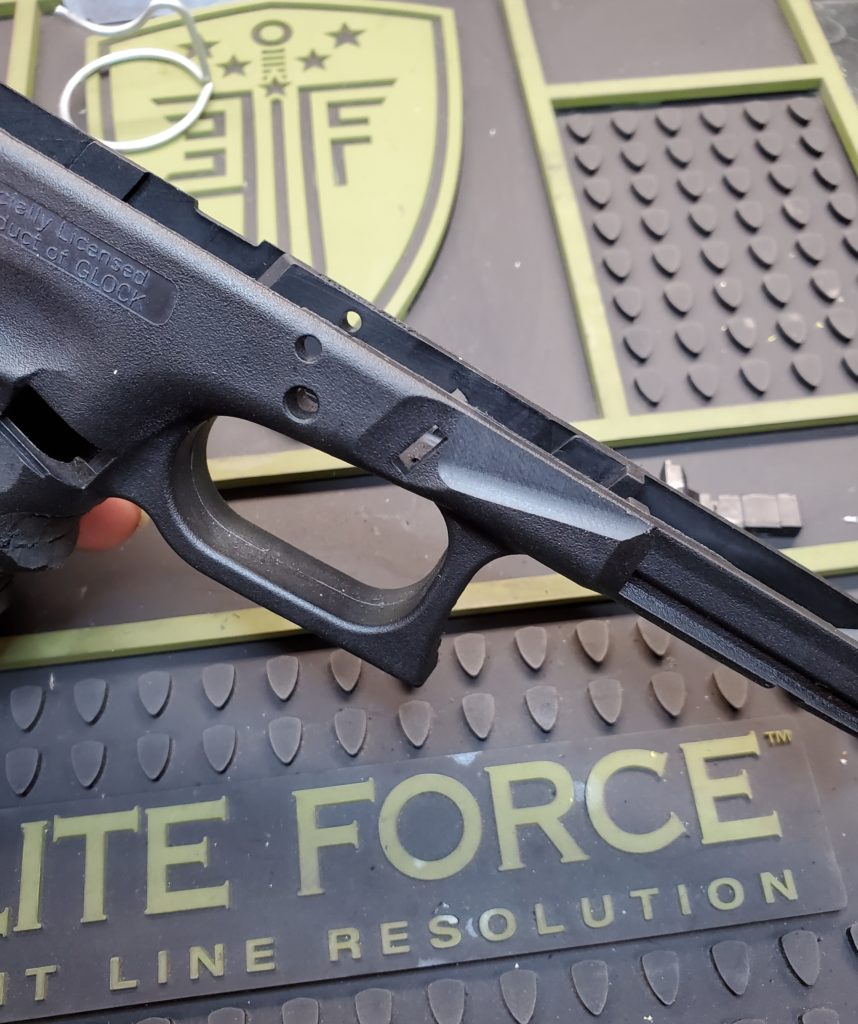
Moving on, we noticed something that we did not like on the Elite Force Glock. The magazine release is sitting too flush on the frame. I like the magazine catch to stand proud of the frame to assist in ease of magazine changes.
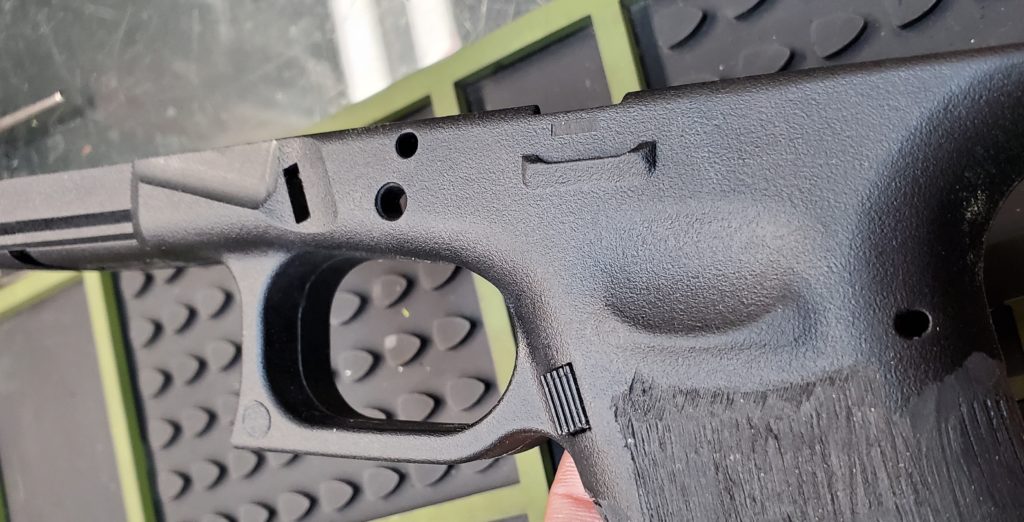
To fix this we will be making a scallop cut to allow the magazine catch to stand proud of the frame. Use the Dremel with a small coarse sanding drum to cut the scallop. After the scallop has been cut begin using finer grit drums to get rid of the sanding lines. Finish the area by hand sanding to get a smooth finish. Start with 400 grit and work you way up to a 2000 grit.
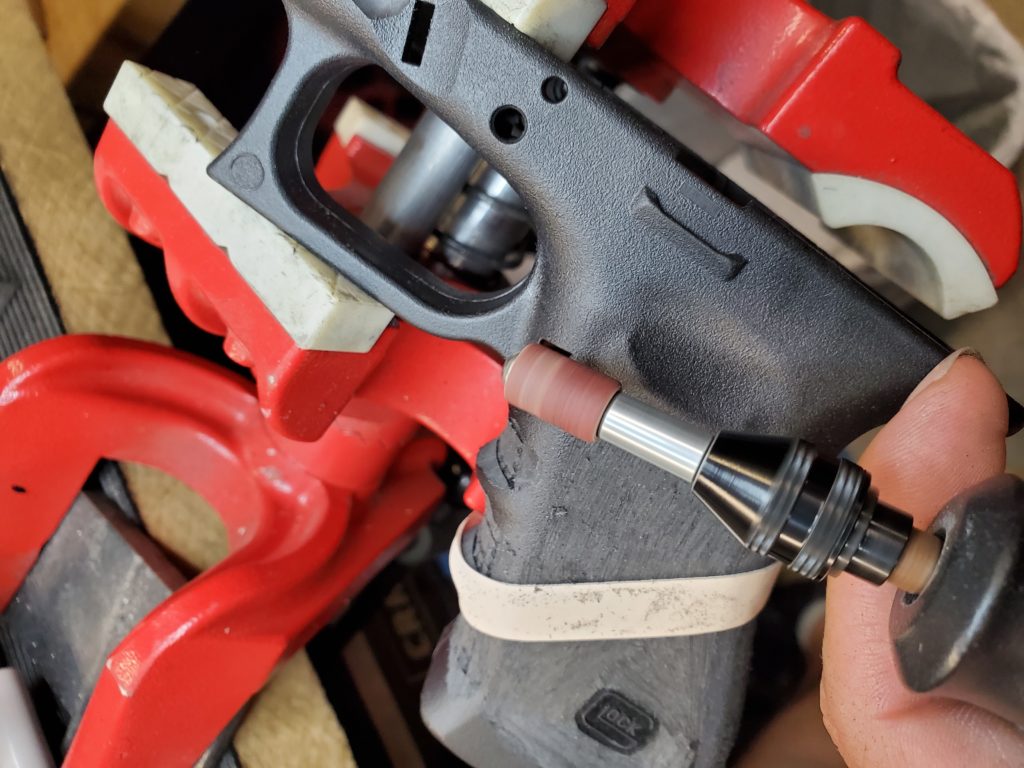
Now it’s time to create the single undercut. This undercut will allow you to grip up a bit higher on the frame. Riding up higher on the grip will allow for more comfort and more control of the pistol. Be careful not to get too greedy on the undercut if you take off too much material you will risk weakening the trigger guard. Make sure to create the rough shape of the undercut but do not cut the grip to its final dimension. We will need to go up in grit on the sanding drums to remove the sanding lines. While we are removing the sanding lines, we will slowly reduce the trigger guard to its final dimensions.
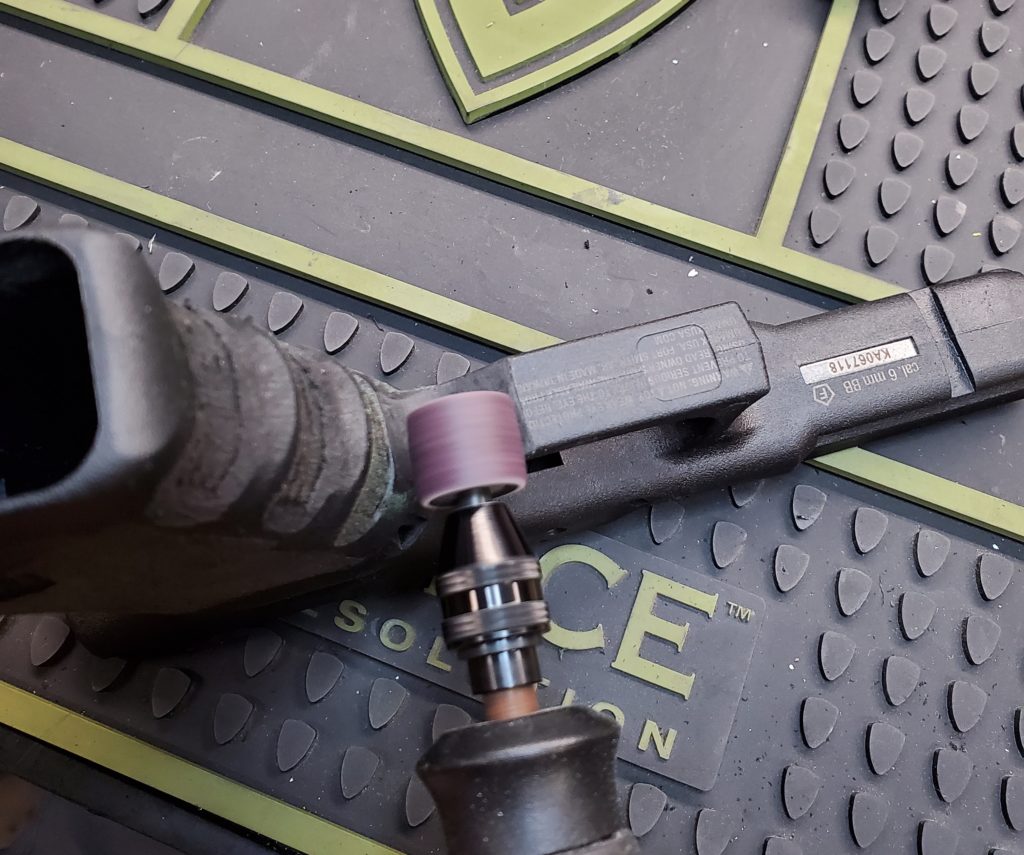
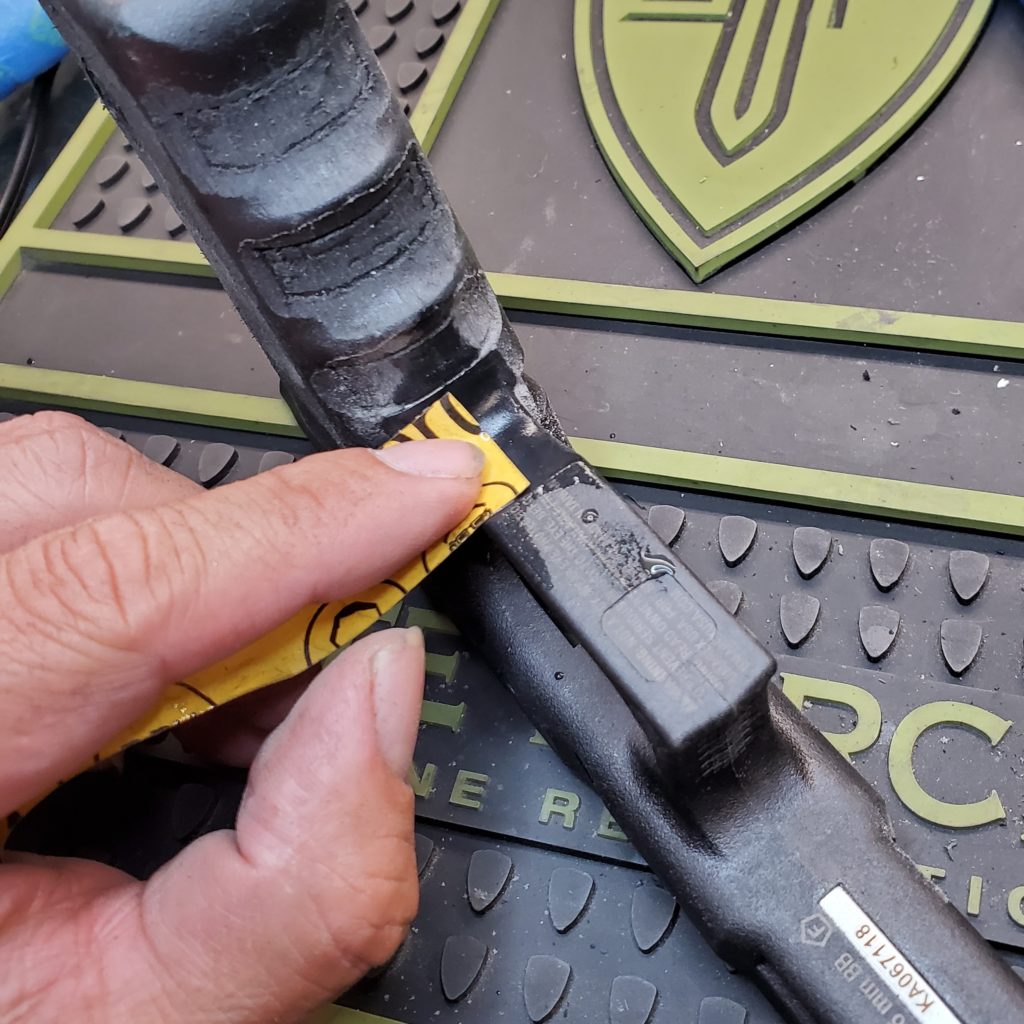
Finish off the single undercut by hand with sandpaper. Starting with 400 grit sand the undercut to smooth going up in grit finish off by wet sanding with 2000 grit. Take your time here and the hard work will pay off with a nice smooth surface.
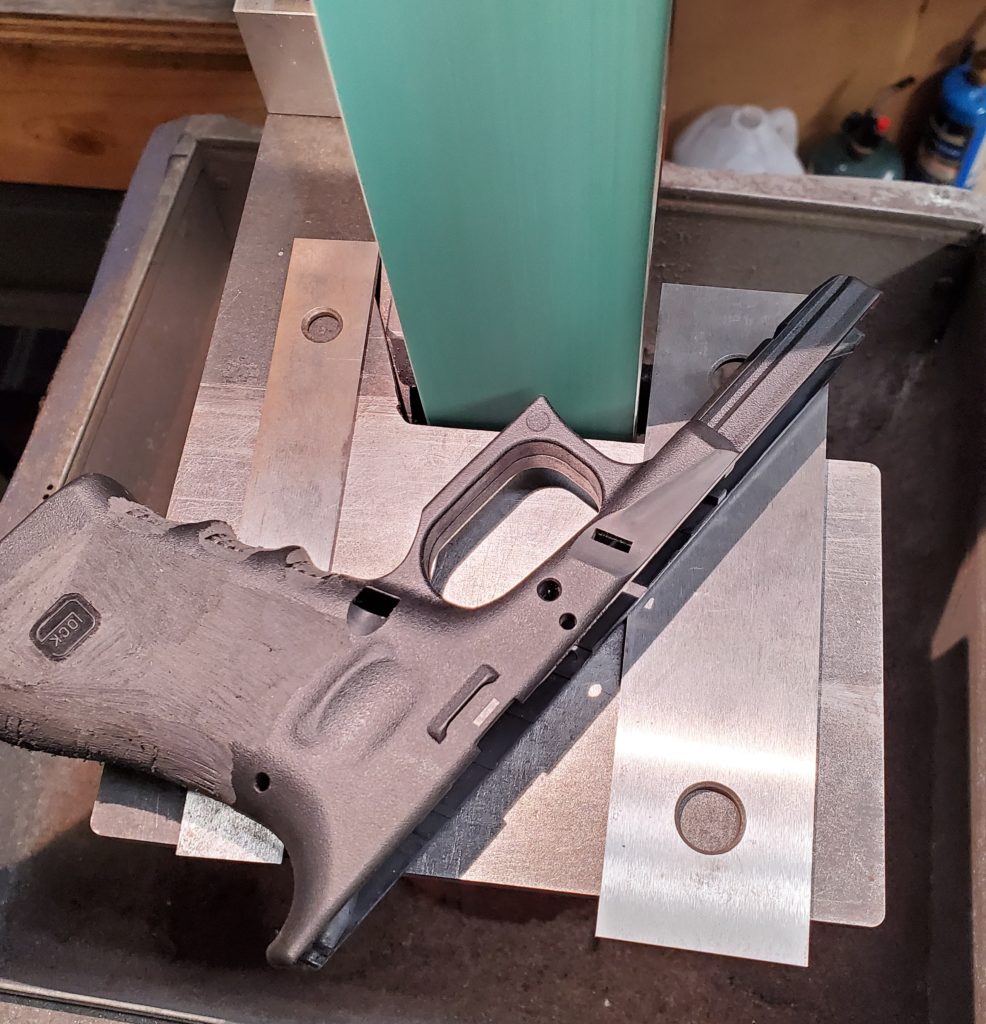
The 45° cut on the front of the trigger guard will be done with a bench grinder. Using some parallel bars and shims we were able to lay the frame flat and make our 45° cut. We used a 220 grit belt to make the cut and because we plan on stippling this portion, we did not bother sanding it smooth.
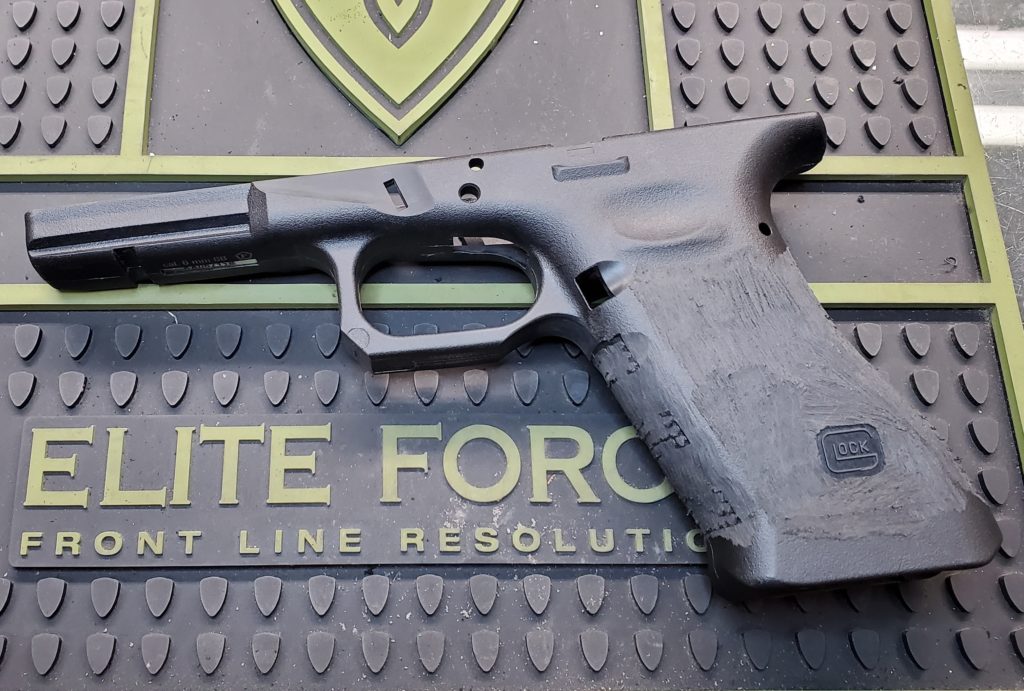
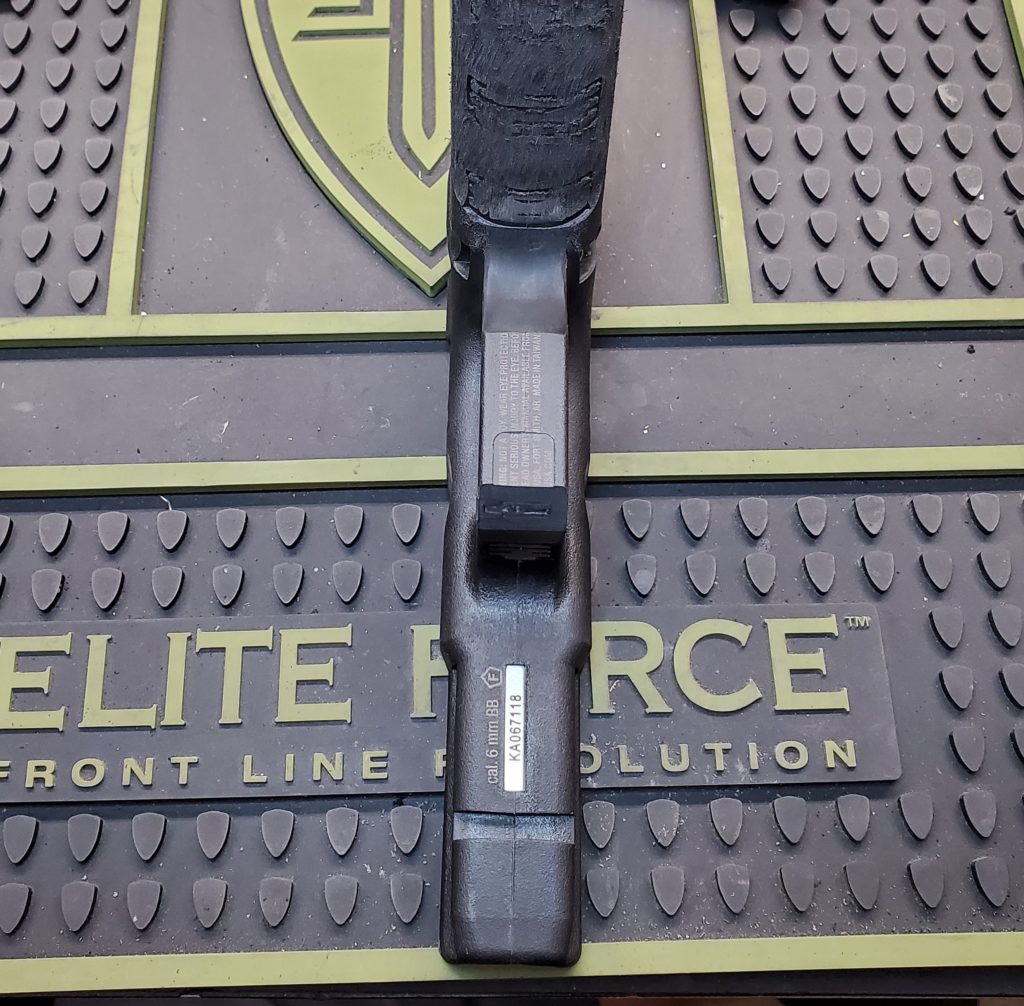
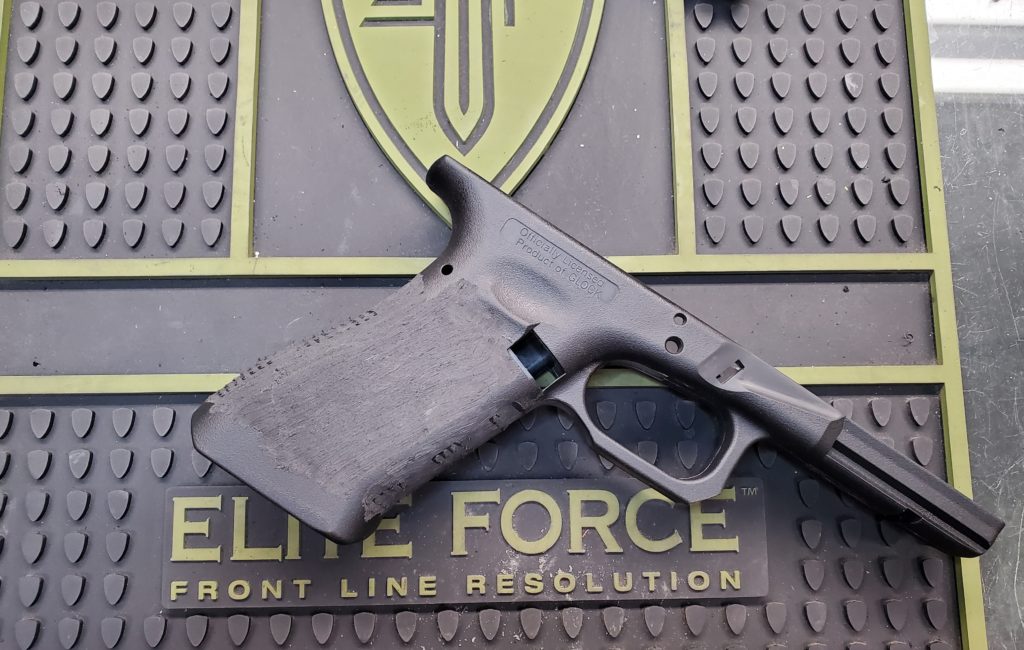
At this point we have completed the preparation of the frame. As you can see by the pictures below, we decided to remove the finger grooves. Thumb ledge has been cut and sanded smooth. The single under cut has been cut and sanded smooth. A 45 degree cut on trigger guard has been done. Lastly, the magazine release area has been scalloped and grip reduction has been performed. The frame feels great and is ready for the real show!
Now It’s Time To Turn The Heat Up!
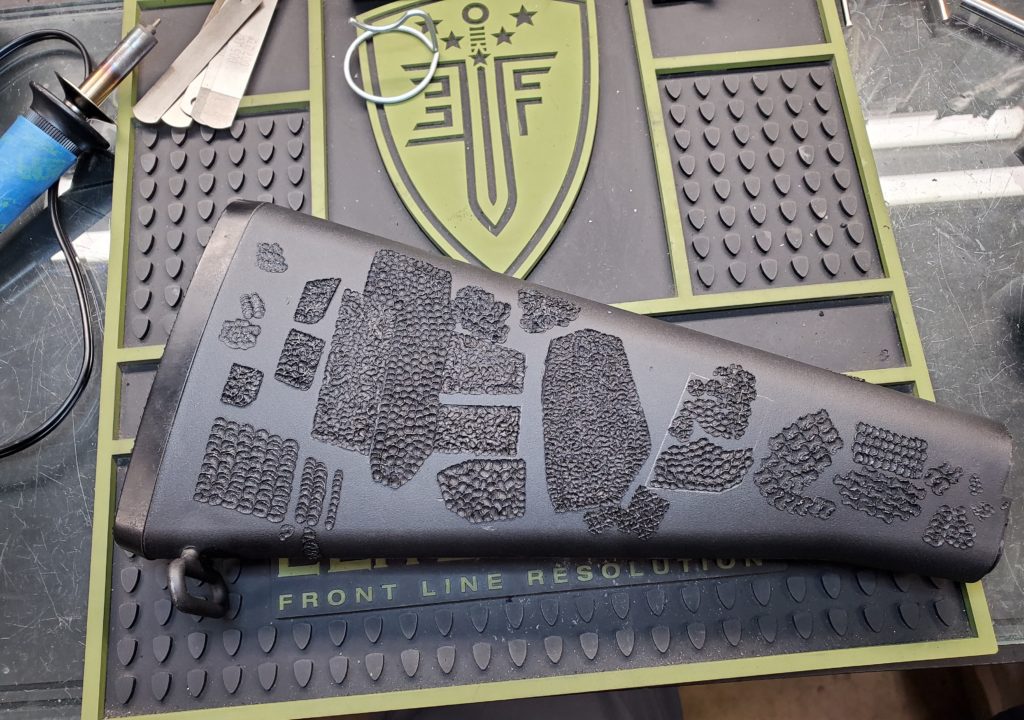
With the frame prepped now, it’s time for us to perform the actual task of stippling. Make sure to wear a respirator; the act of stippling will create toxic fumes that we do not want in our lungs. After preparing our stippling tool by making sure our selected tip is installed, plugged in, and up to operating temperature we will begin making a few test passes. Grab a spare plastic piece (in our case a VFC M16 stock we did some test runs on) to settle on a pattern.
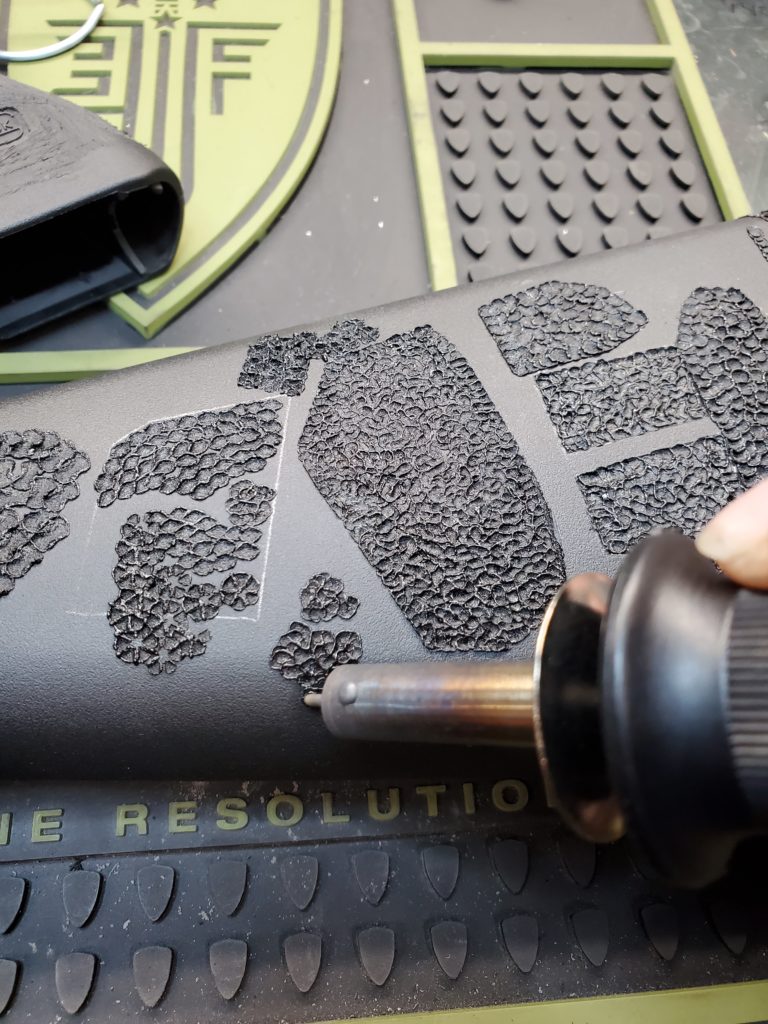
Here is a picture showing different patterns and test passes. We have selected a random stippling pattern. When you touch the stippling tool to the polymer you will see that it melts. By drawing the tool across the surface and changing the depth of the tip in a random pattern we can add texture to the grip. We made sure not to push down too hard so that the tip melts thru the work piece. Small, random depth changes are the key here.
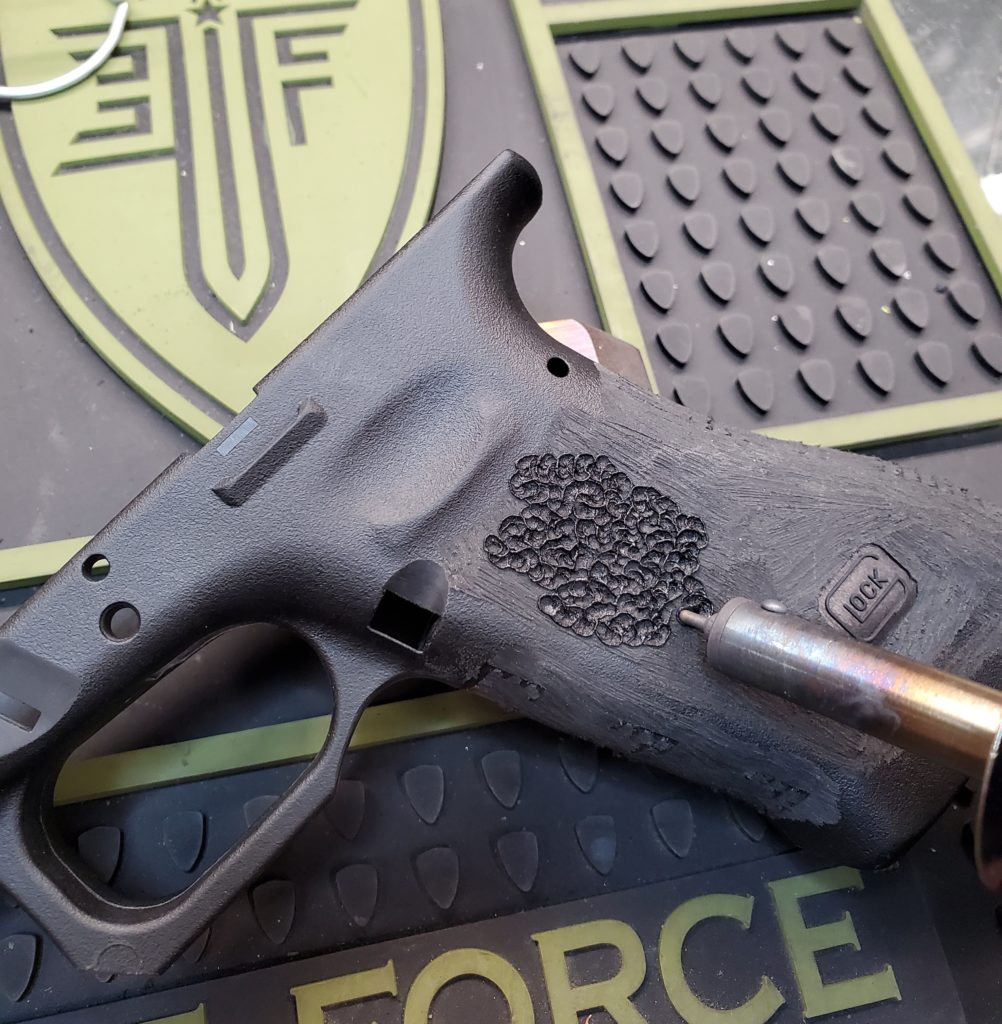
It’s the home stretch! Now is the time to perform the stippling on the frame. Starting from the center of the frame, we’ll start our stippling pattern working our way around the grip. Remember, be mindful of not punching through the work surface. You don’t want to compromise the integrity of the frame as you go, and a little bit goes a long way. It’s very easy to take material away, but very hard to put it back once it’s gone.
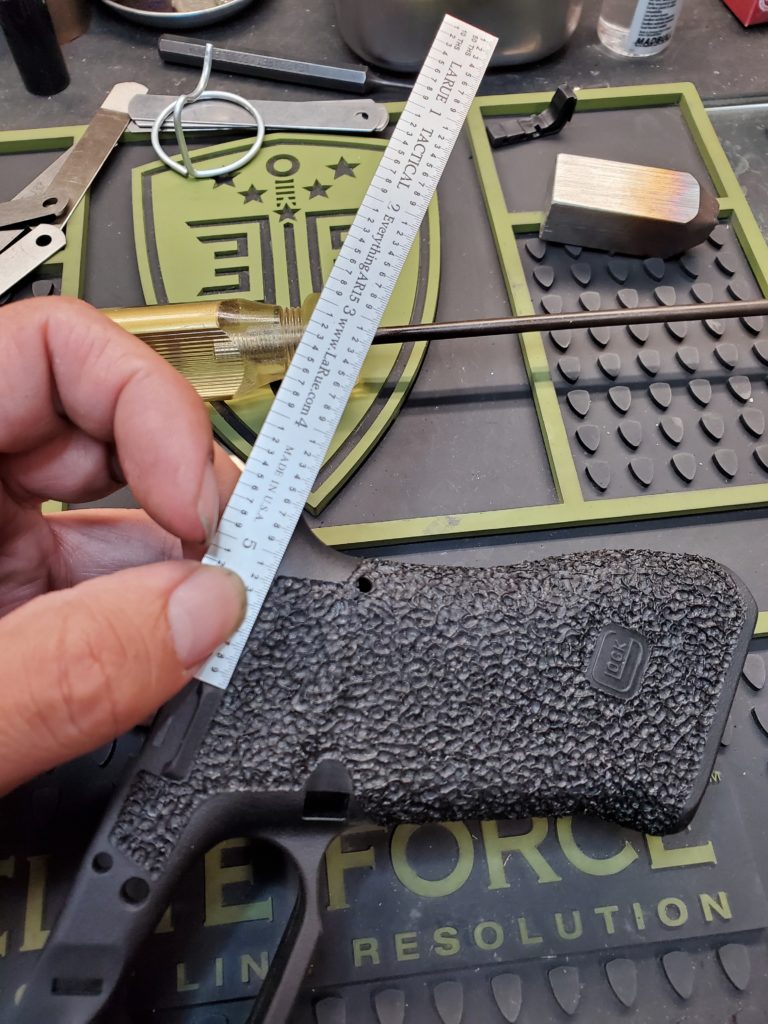
A metal ruler can be used as a brace on the edges to create clean edges to your stippling pattern. Lines can be drawn with a pencil to give us a visual aid to create the edge as well. These borders can give a clean appearance and aesthetic flair, as well as make your finished work look much more professional.
We also decided to stipple the bottom and front side of trigger guard. Every area we stippled is designed to give the shooter more grip and control of the pistol when you shoot it. Keep that in mind as you choose where to stipple the grip on your own gun.
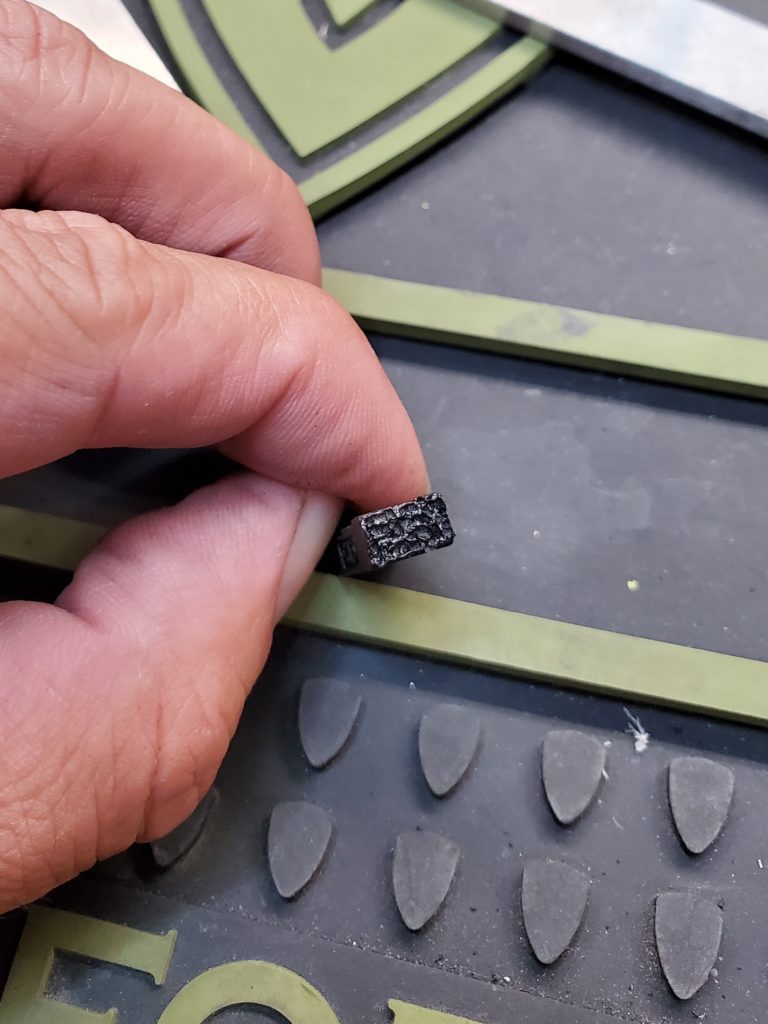
The tip of the magazine release was also stippled for additional texture. This, combined with our scalloped cut around the released, will help make magazine changes much faster and more efficient when you need to reload.
Once we have made our way around the frame, we made sure to have full coverage on the frame. Aestically missed spots on the frame are eye sores. Do a quick visual inspection of the grip for yourself, and address any problem areas until you are happy with the end result!
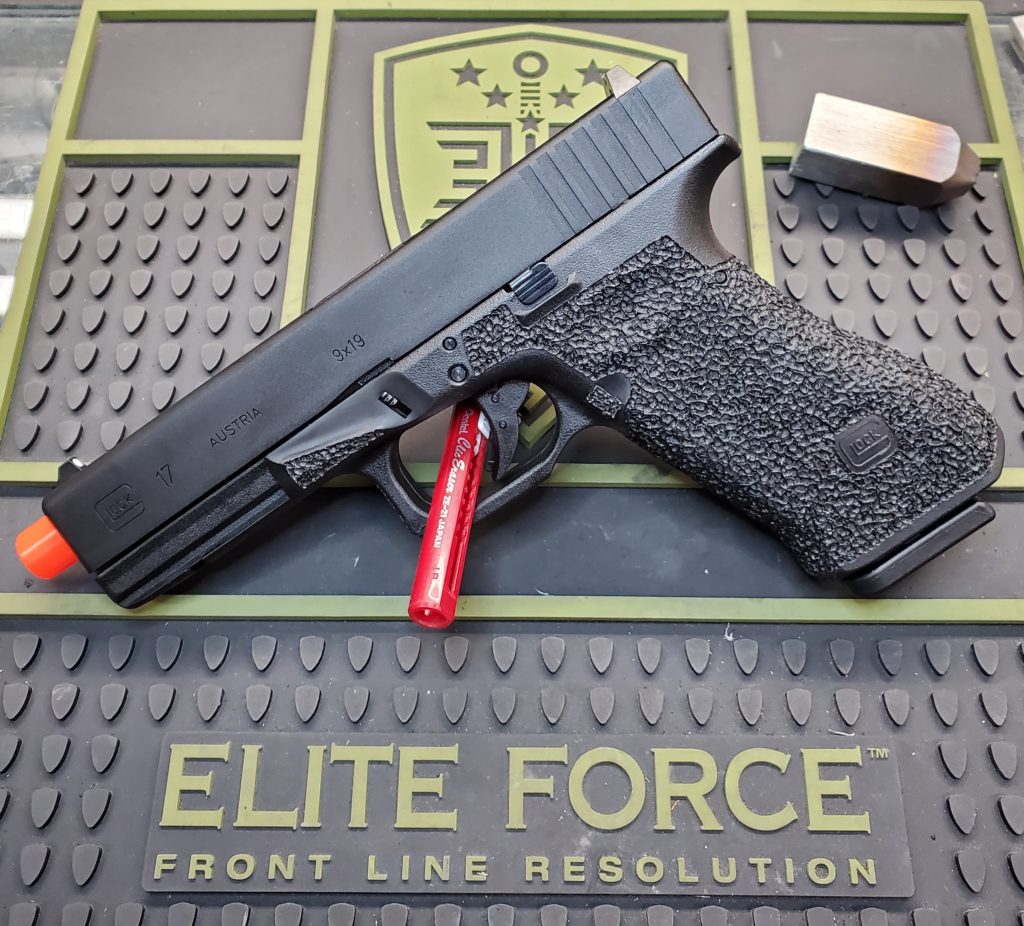
That’s All There Is To It!
Just remember the key to a good stippling job: Prep, Poke, Done.
The secret to success is in ensuring all of your prep work is done before hand and done well. By eliminating all the grease after properly disassembling the pistol, as well as thinking through all of the areas you want to stipple and sanding them down properly and smoothly, you can ensure a much greater chance of success. Being comfortable with your heated tool is essential as well, so don’t be afraid to pick up some surplus plastic or use some old parts from your bone yard to
If you’d like to order your own Airsoft Gun to try and stipple for yourself: Click HERE.
***All stippling for this article performed by C3***

